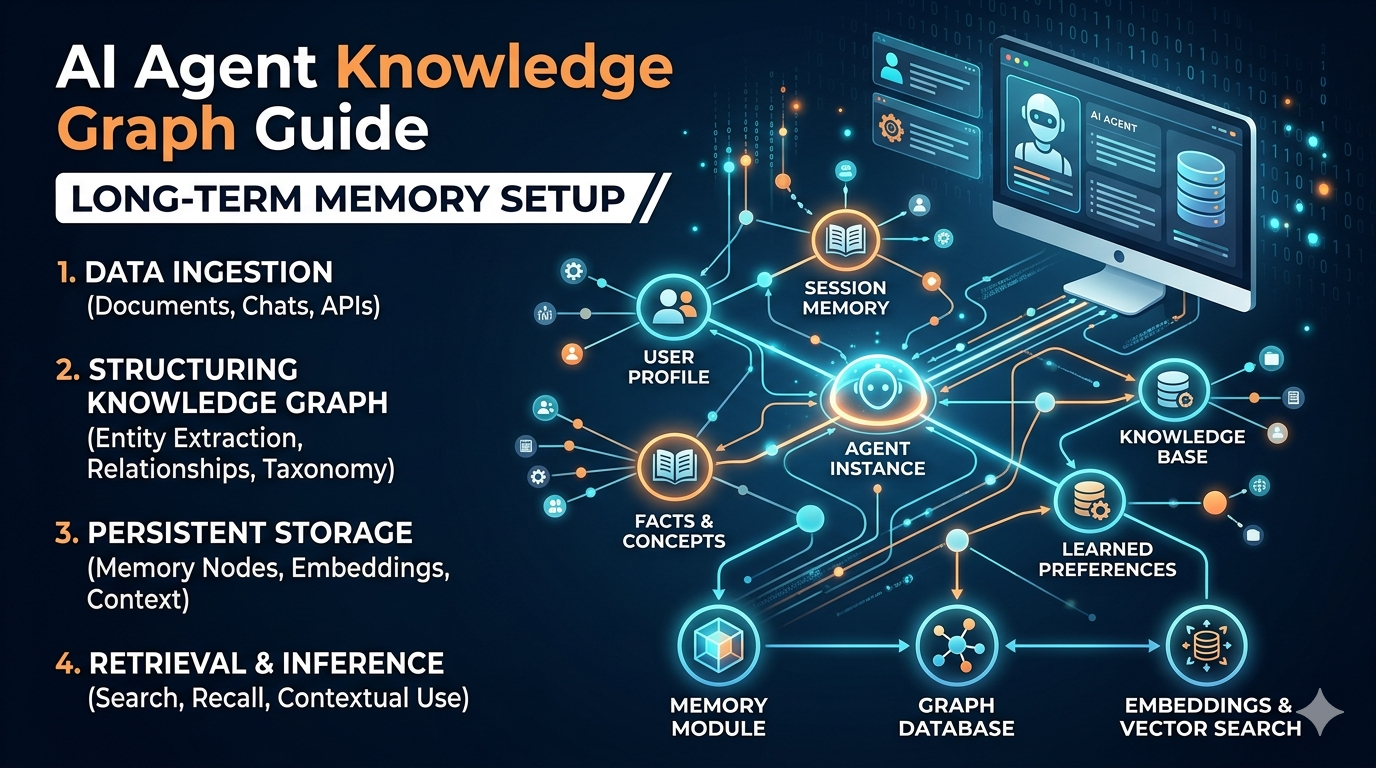
The next evolution of intelligent automation isn’t just about smarter models—it’s about smarter memory. An AI agent knowledge graph enables persistent, relational understanding that transforms how agents recall user preferences, business context, and historical interactions. Unlike basic context windows that forget after 10 messages, knowledge graphs create structured, queryable long-term memory that compounds value with every conversation.
For developers building customer-facing bots, personalized coaching tools, or adaptive learning systems, implementing an AI agent knowledge graph is no longer optional—it’s essential for competitive differentiation. This guide walks through practical implementation using Zep, token optimization strategies, and real-world architecture patterns.
Understanding the Limitations of Simple Memory
Most AI agents begin with linear memory systems that store conversation history chronologically. While functional for brief exchanges, this approach creates three critical bottlenecks:
No semantic reasoning: Agents can’t connect “user prefers video tutorials” with “user struggles with API setup”
Token inefficiency: Full transcript retrieval wastes budget on irrelevant context
When an agent can’t access structured historical knowledge, personalization suffers. Business applications—like onboarding flows or support bots—require memory that understands relationships, not just recites logs.
Building Your AI Agent Knowledge Graph with Zep
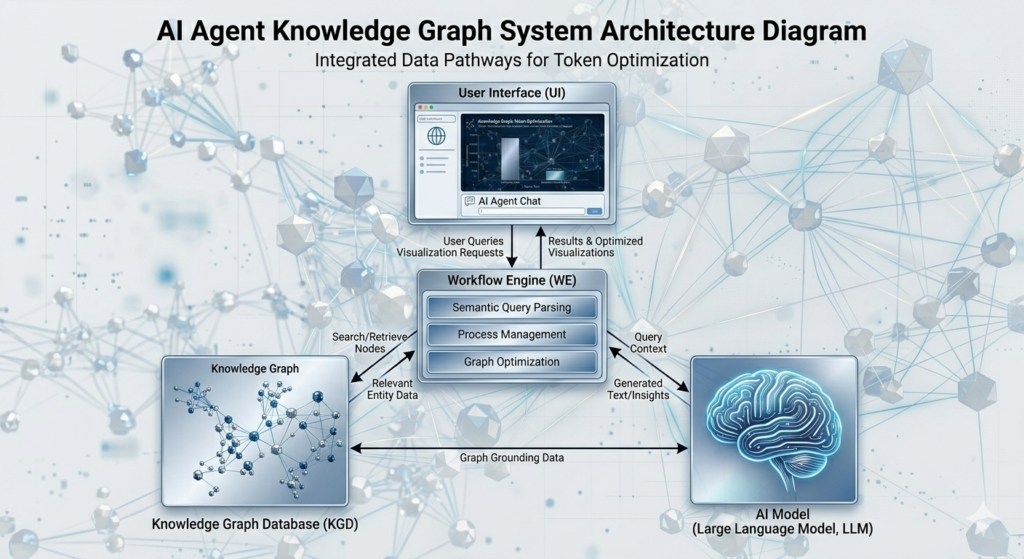
Zep provides a developer-friendly framework for implementing relational memory. The setup process involves three core components:
Step 1: Session Management Configuration
Assign unique session identifiers (Telegram ID, email, UUID) to isolate user graphs. This enables one agent instance to serve thousands of users with personalized memory.
Step 2: Entity Extraction Rules
Define how conversations populate the graph. For example:
When a user says “I live in Chicago,” create a lives_in relationship
When they mention “I use n8n,” link the user entity to the tool entity
Step 3: Relevance-Filtered Retrieval
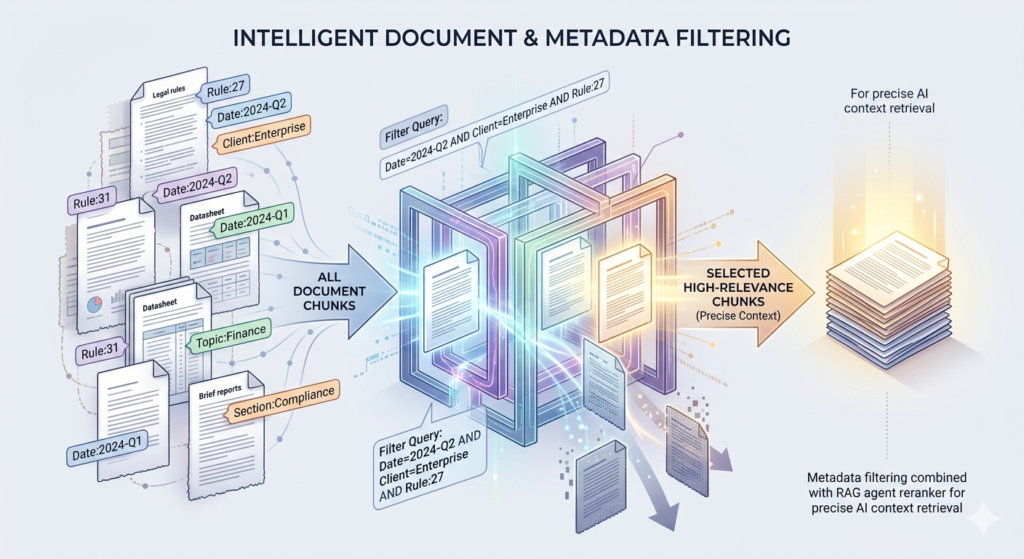
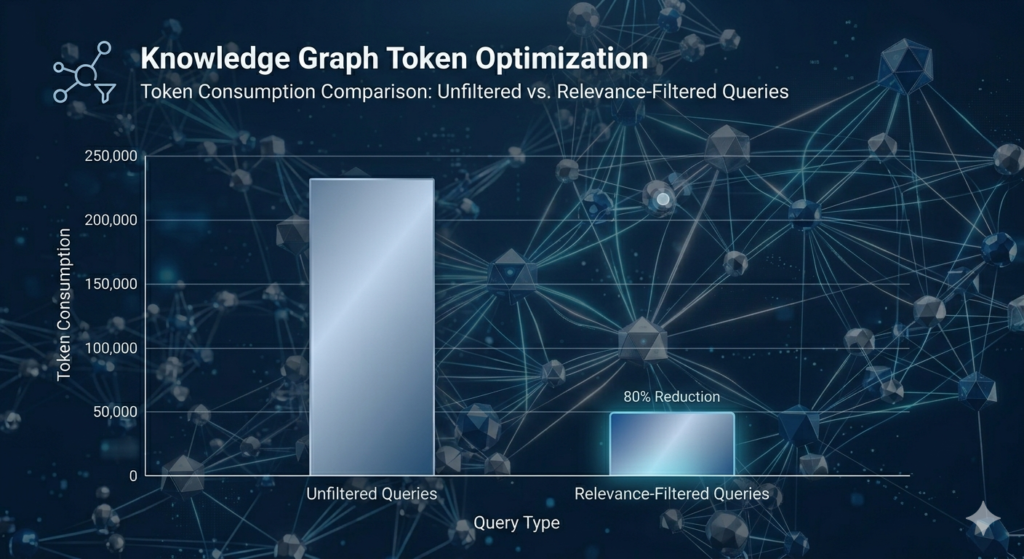
Query the graph with thresholds to avoid token bloat. Instead of retrieving all 50+ user facts, pull only the 3–5 most relevant to the current query.
During testing, a user stating “I love soccer and watch Messi” automatically creates:
User entity: “Jim”
Interest entity: “soccer” with plays relationship
Preference entity: “Messi” with admires relationship
Subsequent queries like “What should I watch this weekend?” leverage these relationships for personalized recommendations—without manual configuration.
Optimizing Token Usage in AI Agent Knowledge Graph Systems
A common implementation mistake: retrieving the entire graph for every query. This causes token consumption to scale linearly with graph size, quickly becoming cost-prohibitive.
The solution: Hybrid retrieval architecture
plaintext1234567
This approach typically reduces token usage by 60–75% while maintaining response quality. Critical implementation details:
Use HTTP requests instead of native integrations for granular control over retrieval parameters
Apply relevance scoring to prioritize contextually appropriate facts
Clean JSON responses via code nodes to remove metadata bloat
For production deployments, separate long-term and short-term memory storage:
Memory Type
Storage Solution
Purpose
Long-term
Zep Knowledge Graph
User preferences, relationships, historical facts
Short-term
PostgreSQL
Recent conversation history (last 5–10 exchanges)
This hybrid model delivers:
Cost efficiency: Only relevant long-term facts + minimal recent history enter the context window
Contextual accuracy: Agents retain immediate conversation flow while accessing deep user knowledge
Scalability: Session-based architecture supports thousands of unique users
Code-Free Implementation Tips
Developers without deep coding experience can leverage AI assistants to generate cleanup scripts:
Copy the raw Zep API response schema
Prompt an AI: “Write a JavaScript function to extract human/AI message pairs from this JSON”
Paste the generated code into an n8n code node
Test and iterate
Read our AI automation best practices – aitoolsupdates.net
Real-World Applications of AI Agent Knowledge Graphs
Organizations across sectors are leveraging this architecture for measurable impact:
E-commerce: Agents recommend products based on past purchases and stated preferences stored in the graph
SaaS onboarding: Flows adapt to user role, company size, and integration needs remembered across sessions
Education: Tutoring bots track learning progress and preferred teaching styles for personalized guidance
The key differentiator: agents that improve with every interaction, delivering compounding value without manual retraining.
Conclusion: Deploy Smarter AI Agents Today
Implementing an AI agent knowledge graph transforms your automation from reactive to relational. By combining Zep’s structured memory with strategic token optimization, you create agents that deliver personalized, cost-efficient experiences at scale.
Your implementation checklist:
Start with a pilot segment to validate graph population logic
Apply relevance filtering from day one to control token costs
Monitor retrieval patterns to refine entity extraction rules
Scale with hybrid storage (Zep + PostgreSQL) for production workloads
The future of conversational AI belongs to systems that remember intelligently—not just extensively. By mastering AI agent knowledge graph architecture today, you position your solutions to lead tomorrow’s personalized automation landscape.
Ready to accelerate development? Explore our library of pre-built workflows and advanced memory patterns at aitoolsupdates.net to implement these strategies faster.
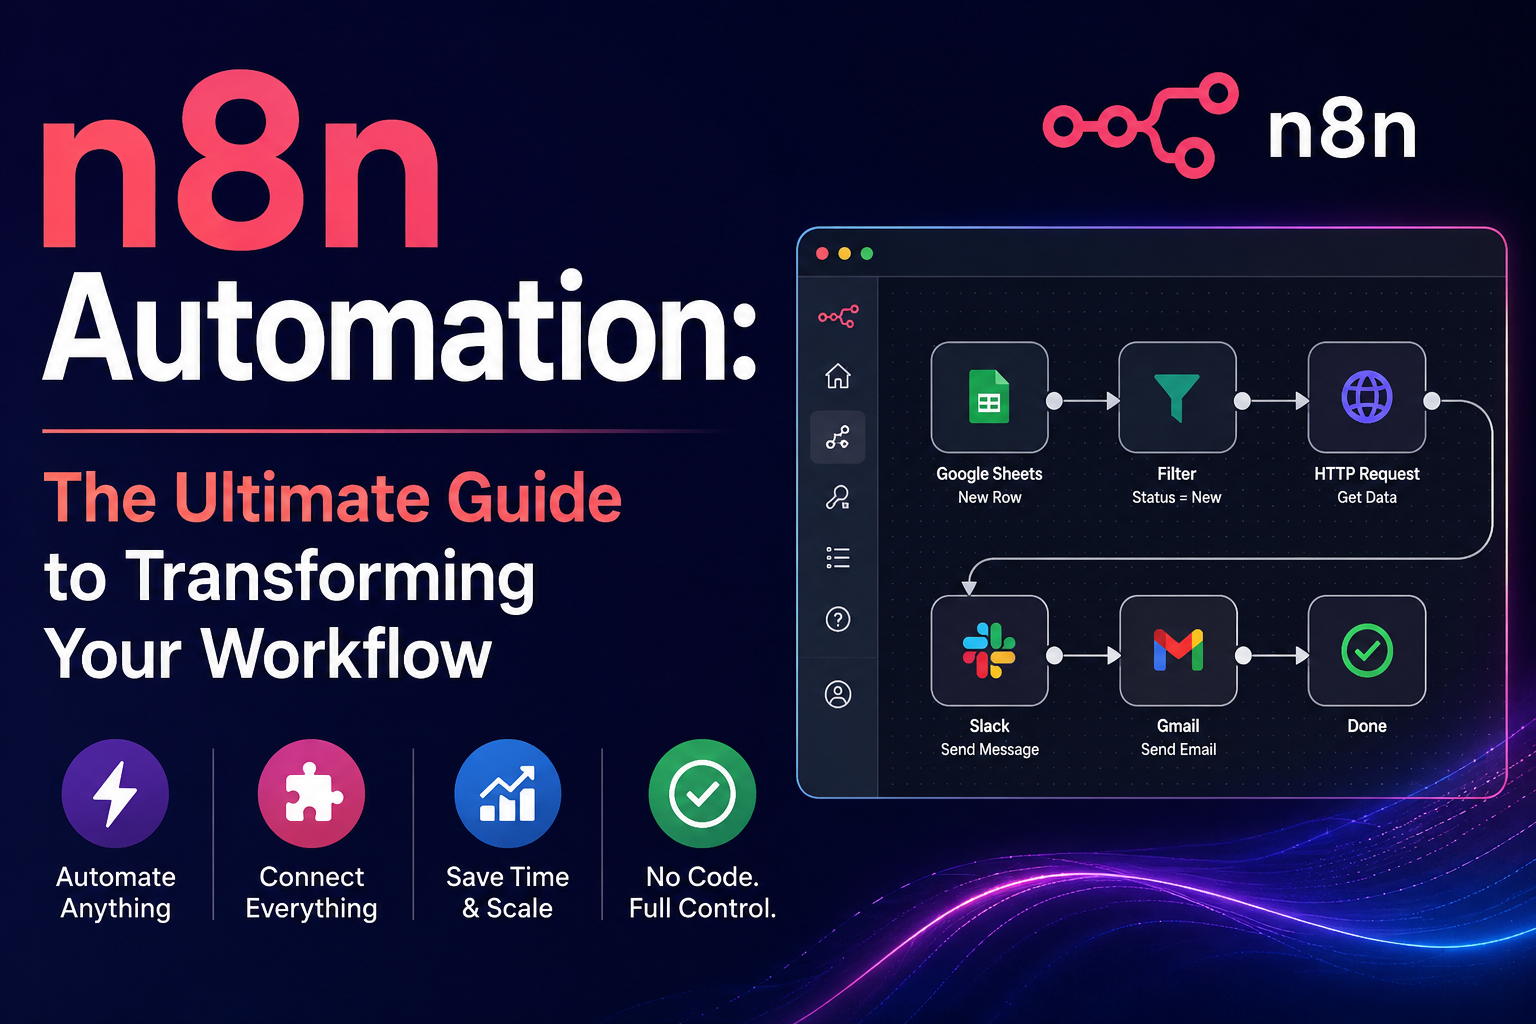
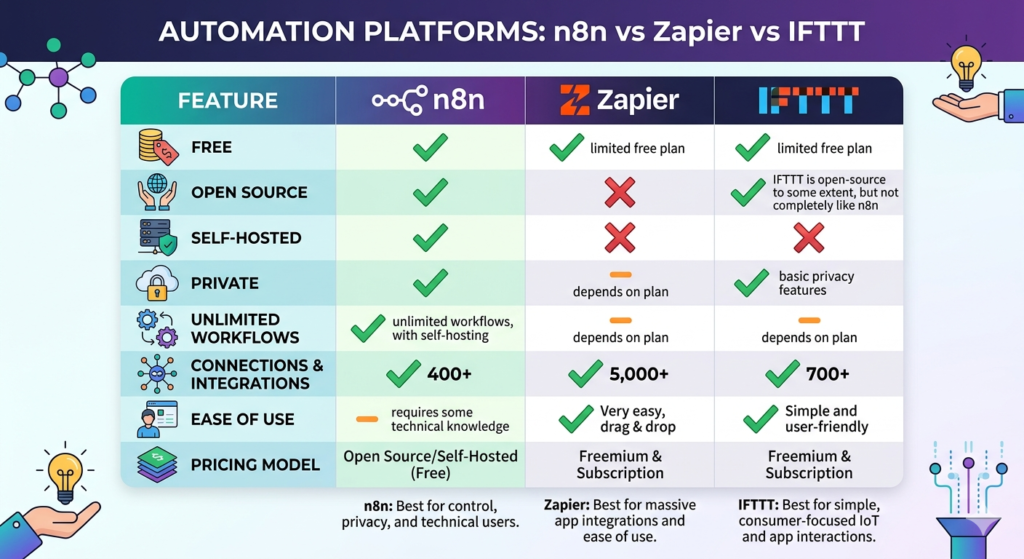
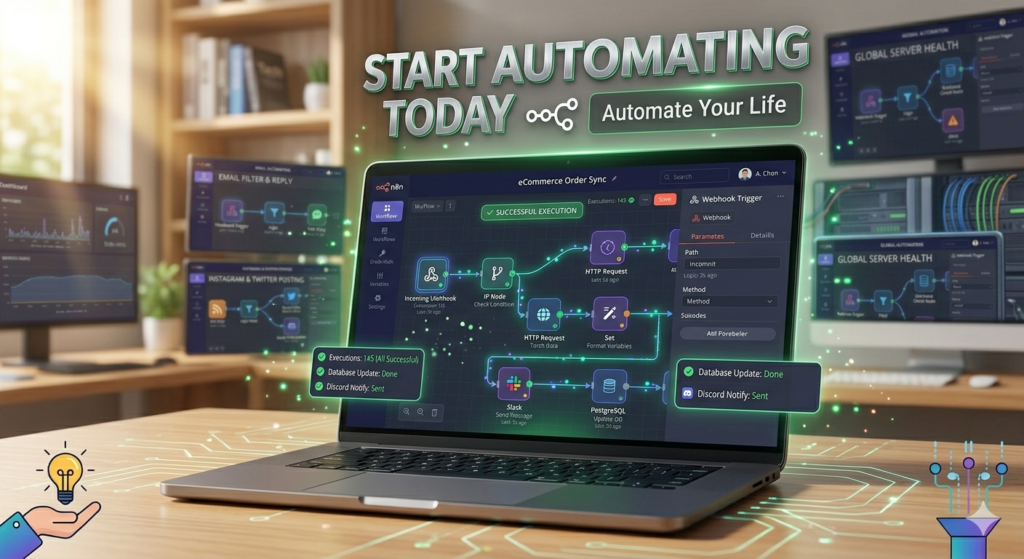
If you’re still manually copying data between apps or checking multiple websites for updates, it’s time to discover n8n automation – the most powerful, open-source workflow automation tool that’s revolutionizing how IT professionals and tech enthusiasts handle repetitive tasks. Unlike expensive alternatives like Zapier or IFTTT, n8n is completely free, self-hosted, private, and gives you unlimited possibilities to automate literally everything in your digital life.
Why n8n is the Automation Tool You’ve Been Waiting For
n8n (pronounced “n-eight-n”) stands out as the ultimate automation platform because it combines enterprise-level power with complete privacy and zero cost. Whether you’re managing a home lab, streamlining your IT operations, or simply trying to keep up with tech news, n8n can handle it all from a beautiful, intuitive graphical user interface.
The platform’s true power lies in its flexibility. You can aggregate news from RSS feeds, automate home lab maintenance, create AI agents that troubleshoot issues before they occur, integrate with hundreds of services, and even execute custom commands on your servers. The hardest part isn’t setting it up – it’s deciding which automation to build first!
Installation Options: Cloud vs Self-Hosted
Getting started with n8n is straightforward, with two primary deployment options to suit your needs:
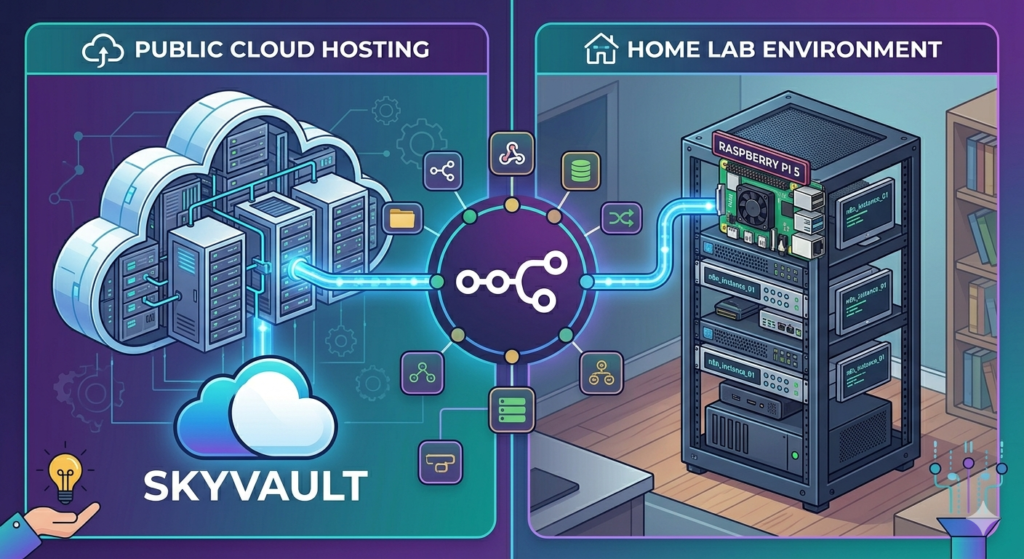
Option 1: Self-Hosted in Your Home Lab
For those who love having complete control, installing n8n on-premises is incredibly lightweight. You don’t need expensive hardware – it runs perfectly on a Raspberry Pi or any Linux server. The installation uses Docker, making deployment simple even if you’re new to containerization. Since n8n isn’t CPU-intensive, it won’t bog down your existing infrastructure.
Option 2: Cloud Hosting (Recommended for Beginners)
If you want to get up and running in minutes rather than hours, cloud hosting is the way to go. Services like Hostinger offer specialized n8n VPS plans that come pre-configured and ready to use. With a KVM 2 plan, you’ll have enough resources to run n8n alongside other home lab projects like websites, Open WebUI, and various automation tools. Plus, you can often find promotional codes to reduce costs significantly.
Your First n8n Workflow: Building a News Aggregator
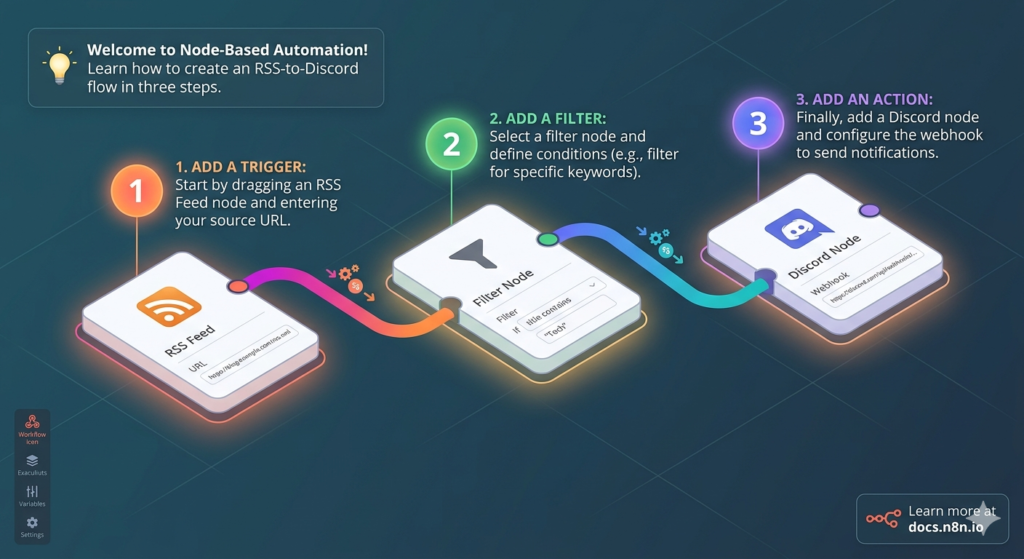
Let’s dive into creating your first automation. We’ll build a practical news aggregator that pulls tech news from your favorite sources and delivers it directly to your Discord channel.
Step 1: Setting Up Triggers
Every workflow starts with a trigger – the event that kicks off your automation. In n8n, you can use:
Manual Trigger: Perfect for testing workflows
Schedule Trigger: Run automations at specific times (daily, hourly, etc.)
Webhook Trigger: Respond to external events
For our news aggregator, we’ll use a schedule trigger set to run daily at midnight, ensuring you wake up to fresh tech news every morning.
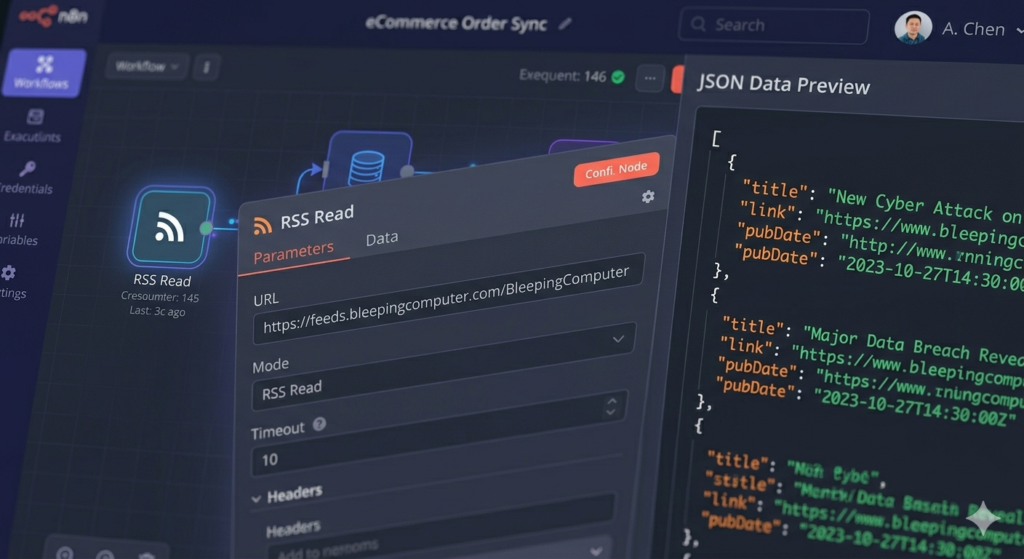
Step 2: Adding RSS Feed Integration
The RSS Read node is where the magic begins. Simply add your favorite tech news sources:
BleepingComputer for security news
Krebs on Security for in-depth security analysis
Hacker News for community-driven tech discussions
Subreddits relevant to your interests
When configured, n8n fetches all articles from these feeds, parsing titles, authors, publication dates, links, and full content into structured JSON data that you can manipulate however you like.
Step 3: Filtering and Limiting Results
Nobody wants to wake up to 50+ news articles. Use the Limit node to control how many items pass through your workflow. Setting it to 5-10 items ensures you get the most important news without feeling overwhelmed.
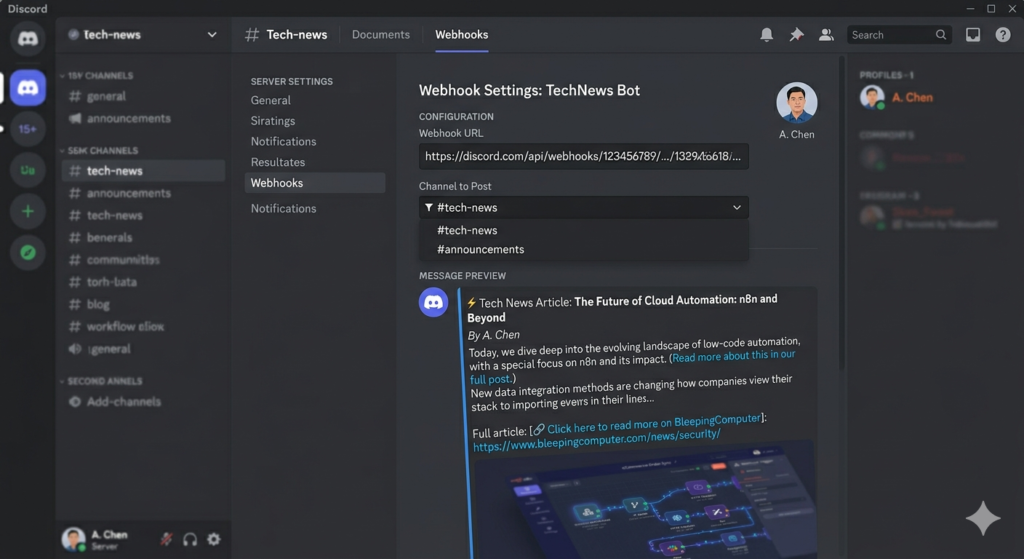
Step 4: Discord Integration
Connecting n8n to Discord is straightforward:
Create a Discord webhook in your server settings
Add the Discord node to your workflow
Select “Send Message” as the action
Paste your webhook URL as credentials
Map your RSS data to the message content
Here’s where n8n’s visual interface shines – simply drag and drop fields from your RSS data (like {{ $json.title }} or {{ $json.creator }}) into the message builder. n8n automatically formats these as JavaScript expressions, but you don’t need to be a coding expert to use them.
Advanced Automation: Adding AI Power to Your Workflows
This is where n8n truly separates itself from basic automation tools. By integrating AI models, you can:
AI-Powered Article Summarization
Instead of reading full articles, let AI summarize them for you:
Add an LLM Chain node between your RSS reader and Discord sender
Connect an AI model (OpenAI’s GPT-4, Anthropic’s Claude, or even local models like Llama via Ollama)
Create a prompt: “Summarize this article in 2 sentences: {{ $json.content }}”
Watch as n8n automatically generates concise summaries for each article
The platform tracks token usage in real-time, helping you manage costs when using paid AI services. For privacy-focused users, local models running on your hardware provide unlimited summarization without sending data to external APIs.
Smart Filtering with AI
Take it further by having AI rate articles based on your interests:
“Rate this article 1-10 for relevance to cybersecurity professionals”
“Determine if this news requires immediate attention”
“Categorize as: breaking news, tutorial, opinion, or research”
This creates an intelligent news filter that learns your preferences and prioritizes what matters most to you.
Home Lab Automation: Beyond News Aggregation
n8n’s power extends far beyond RSS feeds. For IT professionals and home lab enthusiasts, the possibilities are endless:
System Monitoring and Alerts
Use the Execute Command node to run system checks:
bash123
Combine this with AI analysis:
“Analyze these ping results and tell me in a funny Eddie Murphy impression if the internet is up”
“Check disk usage and alert me if any partition is above 80%”
“Verify all critical services are running and summarize their status”
SSH Integration for Remote Management
The SSH node lets you:
Execute commands on remote servers
Configure network switches and routers
Deploy updates across multiple machines
Automate backup procedures
Troubleshoot issues before users notice them
AI Agents with Memory and Tools
This is n8n’s killer feature: AI Agents that can make decisions and take actions autonomously. Unlike simple LLM chains, agents have:
Memory: They remember previous interactions
Tools: Access to commands, APIs, and functions
Autonomy: They decide which tool to use based on your query
Ask: “Is the internet working?” or “Is Terry (my server) online?”
The agent intelligently selects the right tool, executes it, and provides a natural language response. This is the foundation for building sophisticated IT automation that can troubleshoot issues, perform maintenance, and even predict problems before they occur.
YouTube Automation: Never Miss Important Content
Every YouTube channel has an RSS feed, which means n8n can monitor your favorite creators and notify you of new videos:
Add Channel IDs: Create a list of channels you want to track
Use Split Out Node: Process multiple channels simultaneously
Filter by Date: Only show videos from the last 3 days
AI Summarization: Have AI analyze video transcripts and comments to determine if you actually need to watch the full video
This approach frees you from YouTube’s algorithm and ensures you see content from creators you actually care about.
Data Manipulation Techniques
Mastering these n8n nodes will supercharge your workflows:
Merge Node: Combine data from multiple sources (RSS feeds + system stats + AI summaries)
Set Field Node: Extract only the data you need, reducing clutter
Split Out Node: Process arrays of items individually
Filter Node: Remove items that don’t meet your criteria
Code Node: Write custom JavaScript for complex transformations
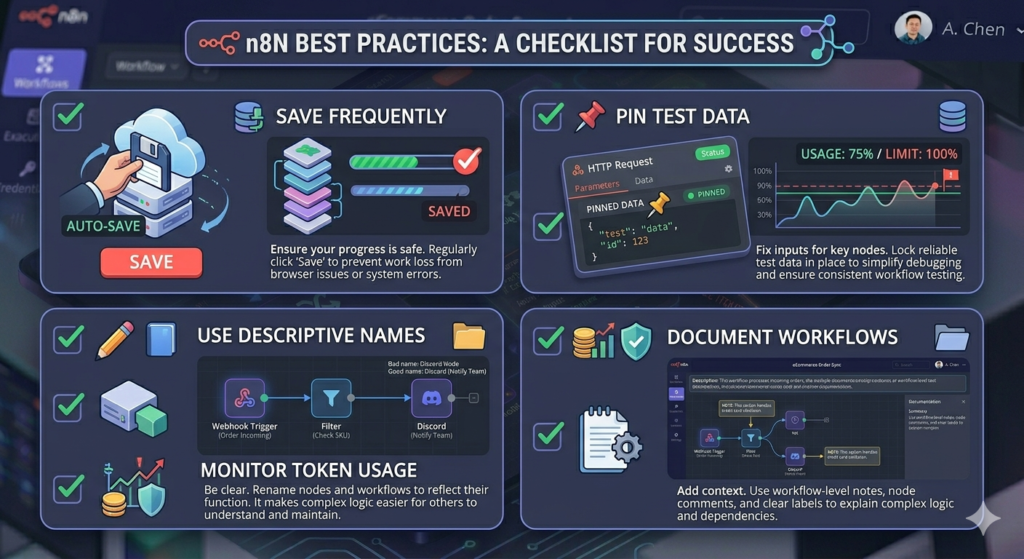
Pro tip: Use the “Pin Data” feature during development to keep test data available across workflow executions, saving time and API calls.
Best Practices for n8n Success
Save Frequently: n8n doesn’t auto-save during complex edits
Name Your Workflows Descriptively: “Daily Tech News Digest” is better than “Workflow 1”
Use Credentials Securely: Never hardcode API keys; use n8n’s credential management
Monitor Execution History: Review past runs to debug issues and optimize performance
Start Simple, Then Scale: Master basic nodes before building complex AI agents
Duplicate Before Major Changes: Use the duplicate feature to experiment safely
The Future of Your Automation Journey
What we’ve covered here is just the beginning. With n8n, you can:
Automate your entire email workflow with AI-powered responses
Post to social media platforms on schedule
Integrate with home automation systems (Home Assistant, smart devices)
Create custom APIs and webhooks
Build complete business process automation
Develop AI-powered customer support bots
Automate data entry and reporting
The community around n8n is vibrant and growing, with hundreds of pre-built templates and nodes for virtually every service imaginable. And if a service doesn’t have a native integration, you can use HTTP requests, webhooks, or custom code to connect to it.
Ready to Transform Your Workflow?
n8n automation isn’t just a tool – it’s a paradigm shift in how you interact with technology. Instead of spending hours on repetitive tasks, you’ll build once and automate forever. The time you invest in learning n8n pays dividends every single day as your workflows silently handle the mundane while you focus on what matters.
The hardest part is starting. Pick one repetitive task that annoys you daily, and build your first workflow this week. Whether it’s news aggregation, system monitoring, or AI-powered content curation, n8n makes it possible – for free, privately, and with unlimited potential.
Your future automated self will thank you. Now go build something amazing!
The web development landscape is experiencing a revolutionary shift, and bolt.new is at the forefront of this transformation. This innovative AI-powered platform is making waves in the developer community by bridging the gap between design and development like never before
bolt.new. In this comprehensive guide, we’ll explore bolt.new’s groundbreaking feature that converts Figma designs into pixel-perfect, production-ready code for websites and mobile applications.
What is bolt.new?
bolt.new is an AI-powered full-stack web development platform that integrates frontier coding agents directly inside a familiar visual interface
bolt.new. Unlike traditional development workflows that require juggling multiple platforms and dealing with AI anxiety, bolt.new streamlines the entire process in one browser-based environment
skywork.ai. The platform allows developers to prompt, run, edit, and deploy full-stack applications directly from their browser without any local setup
GitHub.
What sets bolt.new apart is its ability to transform natural language prompts into editable, full-stack web and mobile prototypes with an in-browser runtime, exportable code, and one-click deployment capabilities
octogamma.com. Whether you’re building 2D RPG games, racing simulations, physics-based 3D engines, or simple MVPs, bolt.new provides the tools to bring your ideas to life rapidly
boltnewexperts.com.
The Game-Changing Figma to Code Feature
The newest addition to bolt.new’s arsenal is its Figma integration, which allows designers and developers to quickly load Figma designs and generate sites and UIs based on those designs
support.bolt.new. This feature is built on top of Anima’s technology, combining the power of AI with proven design-to-code conversion methodologies
www.animaapp.com.
Why This Matters
For years, the handoff between designers and developers has been a bottleneck in the web development process. Designers would create beautiful mockups in Figma, and developers would spend hours or even days recreating those designs in code. bolt.new eliminates this friction by automatically converting Figma frames into clean, production-ready React code using Vite, complete with Tailwind CSS classes, separated components, and proper variables
www.banani.co.
Step-by-Step: How to Import Figma Designs into bolt.new
Step 1: Connecting Figma to bolt.new
The process begins with establishing a connection between your Figma account and bolt.new. When you select “Import from Figma” for the first time, you’ll need to log into both accounts to create an API connection between the two platforms. This secure connection enables seamless communication and data transfer between Figma and bolt.new.
Step 2: Copying the Correct URL
Here’s where many users make their first mistake: you need to copy the URL of your Figma frame, not the entire Figma page. This distinction is crucial because bolt.new uses the frame as a reference to create the specific component or page you’re targeting.
To do this:
Navigate to your Figma design
Right-click on the specific frame you want to convert
Select “Copy link” to get the frame URL
Return to bolt.new and paste the URL into the Figma importer
Step 3: Let the AI Work Its Magic
Once you’ve pasted the URL, bolt.new goes to work in the background, performing several tasks simultaneously:
Downloading all images and assets
Extracting SVG elements
Building a new project on Vite with ReactJS
Creating variables and separated components
Applying Tailwind CSS class names
Adding manual styling where necessary
This process typically takes just a couple of minutes, after which you’ll have a fully functional website or component ready for customization.
Exploring the VS Code-Like Interface
Once your design is imported, bolt.new presents it in a familiar VS Code-like interface that includes:
React code editor: View and edit the generated React components
Data elements: Access and modify component data and props
Live preview: See your design rendered in real-time
File structure: Navigate through separated components and assets
This comprehensive view allows both designers and developers to understand exactly how the design translates into code, making it an invaluable learning tool for those new to web development.
Best Practices for Preparing Figma Designs
To ensure the cleanest, most accurate code generation, proper Figma file preparation is essential. Here are the professional techniques that will maximize your results:
1. Label Your Layers Properly
One of the most common mistakes designers make is leaving layers unlabeled or using generic names like “Frame 1” or “Group 23.” Take the time to rename your frames and layers with descriptive names. For example, instead of “Frame 1,” use “Desktop Size 1440×2910” to give the AI context about the design’s purpose and dimensions.
2. Use Frames Strategically
Frame your elements logically. For instance, if you have a navbar, select all navbar elements, right-click to “Frame Selection,” and rename it “navbar.” This hierarchical structure helps bolt.new understand the relationship between elements and generate more semantic code.
3. Expand Groups and Layer Child Elements
Don’t rely heavily on nested groups. Instead, expand all groups and properly layer child elements. This gives the AI clearer visibility into your design structure and results in cleaner, more maintainable code.
4. Implement Auto Layouts
This is perhaps the most important preparation step. Auto layouts in Figma allow you to move elements left, right, up, or down while maintaining proper spacing and alignment. When combined with bolt.new’s conversion engine, auto layouts ensure that components are designed with proper responsive behavior and CSS flexbox or grid structures
www.locofy.ai.
Auto layouts provide the AI with crucial information about:
Spacing between elements
Alignment preferences
Responsive behavior
Component relationships
5. Organize Your Design System
If you’re using design tokens, color styles, or text styles in Figma, make sure they’re properly named and organized. This helps bolt.new create consistent CSS variables and maintain design system integrity in the generated code.
Customizing Your Imported Design
Once your Figma design is converted to code, the real power of bolt.new shines through its AI-powered customization features.
Element Selector Tool
Use the element selector to click on specific components you want to modify. This visual approach makes it easy to target exact elements without needing to hunt through code.
Chat-Based Customization
Simply describe what you want to change in natural language. For example:
“Change the price from $19 to $50 per month”
“Update the heading text to ‘Premium Design Course’”
“Make the button color blue”
bolt.new’s AI will jump back into the code, rewrite the component, update the values, and instantly display the new design. This iterative process allows for rapid prototyping and refinement without manual coding.
Comprehensive Design Overhauls
Need more than granular changes? You can request complete design transformations with prompts like: “Update this entire pricing component to reflect a design course I’m selling, ensuring all feature items are specific to design education rather than generic placeholders.”
The AI understands context and will rewrite multiple components to maintain design consistency while implementing your requested changes.
Real-World Applications and Use Cases
While the Figma import feature is powerful on its own, it’s important to understand that bolt.new is a comprehensive development platform capable of creating all sorts of applications
mindlabssys.com.
Rapid MVP Development
For entrepreneurs and startups, bolt.new enables incredibly fast MVP (Minimum Viable Product) development. Import your Figma designs, customize with AI assistance, and deploy to platforms like Supabase, all within hours instead of weeks.
Mobile App Development
Using frameworks like Expo, you can convert Figma mobile designs into functional React Native applications. The same principles apply: proper Figma preparation, import, customization, and deployment.
Educational Tool
For those learning web development, bolt.new serves as an exceptional educational resource. By examining how your Figma designs translate into React, HTML, and CSS code, you gain valuable insights into:
Component structure
Responsive design principles
CSS organization with Tailwind
React best practices
Proper element hierarchy
Professional Workflow Enhancement
Even experienced developers benefit from bolt.new’s ability to handle repetitive coding tasks. Instead of manually coding standard components like pricing tables, navigation bars, or contact forms, import them from Figma and focus your energy on complex business logic and unique features.
Deployment and Next Steps
Once you’re satisfied with your design and customization, bolt.new offers several deployment options:
Download Files: Export all code files to continue development in your local environment
Publish Directly: Deploy your project using bolt.new’s built-in hosting
Deploy to Supabase: Connect to Supabase for backend functionality and database integration
Export to Other Platforms: Integrate with platforms like Vercel, Netlify, or your preferred hosting solution
The generated code is production-ready, using industry-standard frameworks like ReactJS, Vite, and Tailwind CSS, ensuring compatibility with modern development workflows
pandaitech.my.
Why bolt.new Stands Out in the Design-to-Code Landscape
While there are several tools available for converting Figma to React code, including Locofy.ai, Builder.io’s Visual Copilot, and Anima, bolt.new distinguishes itself through several key features
DEV社区
www.builder.io
www.locofy.ai:
1. Full-Stack Capabilities
Unlike tools that only generate frontend code, bolt.new supports full-stack development, allowing you to build complete applications with backend integration.
2. AI-Powered Customization
The ability to modify designs through natural language chat sets bolt.new apart from traditional design-to-code converters that require manual code editing.
3. Browser-Based Development
No local setup required. Everything runs in your browser, making it accessible from any device and eliminating environment configuration issues
ajay-arunachalam08.medium.com.
4. Integrated Development Environment
The VS Code-like interface provides everything you need in one place: code editor, preview, file management, and deployment tools.
5. Active Development and Community
As a StackBlitz product, bolt.new benefits from continuous improvement and an active developer community
GitHub.
Tips for Maximizing Your bolt.new Experience
Start Simple
If you’re new to bolt.new, begin with simple components like buttons, cards, or pricing tables before tackling complex multi-section pages.
Iterate Quickly
Don’t aim for perfection in your first Figma design. Import, see the results, adjust your Figma file, and re-import. The rapid iteration cycle is one of bolt.new’s greatest strengths.
Learn from the Code
Take time to review the generated code. Understanding how the AI translates your designs will make you a better designer and help you prepare Figma files more effectively.
Combine with Other AI Tools
Consider using AI tools like Claude or ChatGPT to help refine your prompts for bolt.new or to generate content for your designs before importing.
Join the Community
Engage with the bolt.new community to share tips, learn from others’ experiences, and stay updated on new features and best practices.
Conclusion: The Future of Design-to-Development Workflow
bolt.new’s Figma import feature represents a significant leap forward in bridging the gap between design and development. By automating the tedious process of converting designs to code while maintaining pixel-perfect accuracy, it frees designers and developers to focus on what truly matters: creating exceptional user experiences.
Whether you’re a designer looking to bring your creations to life without deep coding knowledge, a developer seeking to accelerate your workflow, or an entrepreneur wanting to rapidly prototype ideas, bolt.new provides the tools to succeed.
The platform’s ability to handle everything from simple components to complex full-stack applications, combined with its AI-powered customization and deployment capabilities, makes it an invaluable addition to any modern web development toolkit. As the platform continues to evolve and the community grows, we can expect even more innovative features that will further revolutionize how we transform designs into functional, production-ready applications.
Ready to transform your Figma designs into code? Start experimenting with bolt.new today and experience the future of web development.

The AI landscape just witnessed a groundbreaking release that’s sending shockwaves through the developer community. Qwen 3.6 Plus has emerged as a powerful open-source agentic coding model that combines a massive 1 million token context window with exceptional multimodal reasoning capabilities. This isn’t just another language model—it’s a comprehensive AI agent designed to handle real-world tasks with unprecedented sophistication.

What Makes Qwen 3.6 Plus Different?
Unmatched Agentic Coding Capabilities
Qwen 3.6 Plus represents a significant leap forward in autonomous AI agents. Unlike traditional coding assistants that provide snippet-level help, this model excels at full project repository-level problems, terminal tasks, and complex automation workflows. It combines reasoning, memory, and tool use into a single cohesive system, making it a true all-in-one agent solution.
The model’s ability to handle long-horizon planning sets it apart from competitors. Whether you’re debugging complex systems, automating repetitive workflows, or building entire applications from scratch, Qwen 3.6 Plus demonstrates exceptional competence across the board.
Benchmark Performance: Competing with the Giants
When it comes to raw performance, Qwen 3.6 Plus holds its own against industry leaders. The model either surpasses or comes remarkably close to:
Kimi K2.5
Claude Opus 4.5
Gemini 2.5 Pro
On critical benchmarks like SWE-Bench and Terminal-Bench, Qwen 3.6 Plus actually outperforms competing models. Its advanced multimodal reasoning capabilities deliver breakthroughs in:
Complex document understanding
Visual analysis and interpretation
Video reasoning and comprehension
Visual coding tasks
Real-world scenario processing
Front-End Development: Opus-Level Quality
One of the most impressive aspects of Qwen 3.6 Plus is its front-end development prowess. In numerous tests, the model has demonstrated capabilities comparable to Claude Opus, generating sophisticated web applications with:
Clean, modern typography
Dynamic animations and movements
Responsive design elements
Functional interactive components
Professional-grade UI/UX
Real-World Demonstrations
The model’s capabilities shine through in practical applications. Here are some standout examples:
1. Mac OS Browser Clone Using Kilo CLI, Qwen 3.6 Plus generated a fully functional browser-based Mac OS clone complete with:
Finder app with file navigation
Safari browser interface
Messaging and Mail applications
Photos app with clickable galleries
Music player
Calendar and Terminal
System settings with theme toggling (light/dark mode)
Display configuration options
The attention to detail—from SVG icons to functional settings panels—demonstrates the model’s ability to maintain coherence across complex, multi-component projects.
2. F1 Drift Donut Simulation The model created an impressive F1 drift simulation featuring:
Adjustable car direction and RPM controls
Multiple camera angle options
Reset functionality
Realistic physics-based movement
When compared to Claude Opus 4.5’s output on the same task, Qwen 3.6 Plus delivered superior results while competitors failed entirely.
3. TikTok Mobile Clone The AI generated a near-perfect TikTok clone with:
Functional like buttons
Smooth scrolling interface
Mobile-optimized layout
Authentic TikTok UI elements
Multimodal Mastery: Beyond Text
Qwen 3.6 Plus excels in visual understanding and coding. The model can:
Extract and interpret all content from images
Create PowerPoint presentations and spreadsheets
Interact with Excel files
Generate SVG code with animations
Transform videos into condensed lectures
Perform automated video editing (condensing 29-minute videos into 23-second edits)
Visual Coding Breakthrough
In one remarkable demonstration, Qwen 3.6 Plus created a Lord of the Rings slide deck complete with:
Accurate logo design
Story synopsis
Key locations and scenes
Character information
Thematic visual elements
This showcases the model’s ability to understand complex narratives and translate them into professional presentations.
The Minecraft Achievement
Perhaps the most impressive demonstration was a functional Minecraft clone featuring:
Block breaking and placement mechanics
Animated block destruction
Multiple block textures
Functional water physics
Cave system generation
Ore deposits and lava
Health bar system (damage from lava)
Terrain variation
The model added features without explicit prompting, demonstrating emergent understanding of game mechanics. While infinite terrain generation remains a challenge (as it does for most models), the depth of functionality achieved is unprecedented.
Pricing and Accessibility
At $0.50 per 1 million input tokens and $3 per 1 million output tokens, Qwen 3.6 Plus offers exceptional value for its capabilities. This pricing is particularly reasonable considering:
The 1 million token context window
Advanced agentic coding features
Multimodal reasoning capabilities
Production-ready code quality
Getting Started
You can access Qwen 3.6 Plus through multiple channels:
Free Chatbot – Experiment with the model at no cost
API Access – Integrate into your applications
OpenRouter – Free API access
Kilo Code – Completely free through their open-source AI agent
Kilo CLI – Command-line interface for development
The Open-Source Advantage
Even more exciting: smaller open-source versions of Qwen 3.6 Plus are expected to release soon. This commitment to open-source development means:
While Qwen 3.6 Plus is exceptional, it’s important to note:
Speed: The model reasons extensively before outputting, which can make it slower for lengthy code generation
Long Projects: Generating extensive projects may take time due to the model’s thorough reasoning process
Resource Intensive: The 1 million context window requires significant computational resources
However, these trade-offs result in higher-quality, more coherent outputs that justify the additional processing time.
Conclusion: The Future of Agentic AI
Qwen 3.6 Plus represents a serious step forward for fully autonomous AI agents. By combining strong coding abilities, advanced reasoning, and multimodal capabilities into a single system, it sets a new standard for what AI assistants can achieve.
Whether you’re a developer looking to accelerate your workflow, a designer needing front-end support, or a business seeking automation solutions, Qwen 3.6 Plus delivers professional-grade results at an accessible price point.
With upcoming open-source variants and continuous improvements, this model is positioned to become an essential tool in the AI developer’s toolkit. The Qwen team has accomplished something truly remarkable, and the AI community is better for it.
Ready to experience the future of coding? Start experimenting with Qwen 3.6 Plus today through any of the free access methods mentioned above.
Imagine earning up to $30,000 per month by posting AI-generated videos on YouTube—without ever showing your face or recording your own voice. Sounds too good to be true? Think again. The AI podcast niche is exploding, and creators are capitalizing on this opportunity right now.
In this comprehensive guide, I’ll reveal exactly how these faceless channels are generating massive revenue, show you proof of monetization, and walk you through the exact step-by-step process to create your own AI podcast using cutting-edge tools like Wondercraft AI.
Image Generation Prompt: “Professional YouTube workspace setup with multiple monitors displaying AI podcast editing software, modern minimalist design, warm lighting, laptop showing podcast waveform, 4k quality, photorealistic”
Why AI Podcasts Are the Perfect Faceless YouTube Niche
AI-generated podcasts have become one of the most lucrative faceless YouTube niches in 2024. These channels feature two AI hosts having natural, easy-to-understand conversations about everyday topics. What makes them so successful?
They serve a massive audience: English language learners worldwide are hungry for content that helps them improve their listening skills and learn conversational English. AI podcasts deliver exactly that—clear, slow-paced conversations about relatable topics.
They’re incredibly scalable: Unlike traditional podcasts that require expensive voice actors ($500-$1,000 per episode), AI podcasts cost a fraction of the price while maintaining professional quality.
Real Proof: Channels Earning $30K+ Monthly
Let’s look at the numbers. One channel in this niche was created just 9 months ago and has already gained over 1 million subscribers. In the past 30 days alone, this channel received over 3.8 million views, consistently maintaining 3-4 million views monthly.
The Monetization Math
Using YouTube’s standard RPM (Revenue Per Mille) of $3-$8 per 1,000 views, here’s the breakdown:
3.8 million views × $3 RPM = $11,400/month
3.8 million views × $8 RPM = $30,400/month
That’s an average of over $1,000 per day from a single faceless channel!
But wait—does YouTube even monetize AI content?
Yes, absolutely. Proof? These channels have the “Super Thanks” button enabled, which is exclusively available to YouTube Partner Program members. This confirms they’re fully monetized and earning ad revenue.
Step-by-Step: Creating Your First AI Podcast Episode
Ready to create your own AI podcast? Here’s the exact process:
Step 1: Generate Your Podcast Script (Free)
The foundation of any great podcast is a solid script. Using Wondercraft AI’s built-in AI agent “W,” you can generate professional podcast scripts at no cost.
Here’s the prompt formula that works:
Define your podcast: Explain the concept, target audience, and purpose
Introduce your hosts: Give them names and personalities (e.g., Lauren and Ethan)
Set the topic: Choose relatable everyday topics (transportation, hobbies, food, etc.)
Add context: Give your hosts different perspectives (one has a car, one uses public transport)
Structure it: Request an introduction, conversational body, and conclusion
Set the length: Aim for 10-14 minutes (the sweet spot for this niche)
The AI will generate a draft, analyze it, and automatically expand sections to hit your target length. You can then edit any awkward phrasing to make it sound more natural.
Step 2: Choose the Perfect AI Voices
Wondercraft offers hundreds of AI voices, which can be overwhelming. Here’s how to narrow it down:
Use search filters strategically:
Filter by accent (American, British, etc.)
Filter by voice type (podcast-optimized)
Filter by gender for each host
Pro tip: Preview voices by clicking the profile picture. For an English learning podcast, choose voices that speak clearly and at a moderate pace. Standard mode works better than “convo mode” because it’s slower and clearer for non-native speakers.
Step 3: Generate Your Podcast Audio
Once you’ve selected your voices, it’s time to generate the audio. Wondercraft offers two modes:
Standard Mode: Creates individual clips with clear, presentation-style speech (ideal for educational content)
Combo Mode: Blends audio into a single natural-sounding conversation
Cost breakdown: Currently 10 credits per minute of audio. A 12-minute episode costs approximately 127 credits.
Important: You get two free regenerations if any section has glitches. Simply click generate again to fix issues at no extra cost.
Step 4: Create Your Video Background
Now for the visual element. Successful AI podcast channels follow a simple formula:
AI-generated host images
Animated audiogram (visual sound wave)
Large, clear captions
Creating AI Host Images:
You have several options for generating professional host images:
Option A – Nano Banana Pro via Google Gemini: Access through Google AI Studio or Gemini Pro/Thinking mode
Option B – Nano Banana Pro in Wondercraft: Costs 9 credits per image
Option C – FREE Method: Use Leonardo AI’s free tier (150 daily credits) with Nano Banana Pro model. Each image costs 140 credits, but you get 150 free daily—enough for one high-quality image per day with no watermark!
Step 5: Add Professional Polish in Wondercraft’s Video Editor
Switch to video editing mode and assemble your elements:
1. Add Your Background Image Upload your AI-generated host image and extend it across the entire timeline
2. Insert an Animated Audiogram Place it strategically in an empty area of your background. Resize and position it for visual balance
3. Add Your Podcast Name Create bold, eye-catching text with:
Custom font and color
Shadow effects for depth
Professional positioning
4. Enable AI Captions Choose “Block Read” captions that highlight each word as it’s spoken. Customize:
Background color (black works well)
Text border thickness
Font size for readability
Wondercraft’s AI captions sync perfectly with your audio—one of the most accurate I’ve used.
5. Optional: Add an AI Jingle For just 0.4 credits, generate a 10-second intro jingle. Set volume to 20% with a 3-second fade-out for a professional touch.
The Complete Cost Breakdown
Here’s what it actually costs to create a monetizable AI podcast episode:
Wondercraft Creator Plan (with 50% discount): $159/month
Includes 1,000 credits
Enough for approximately 100 minutes of audio
That’s 8-10 podcast episodes per month
Compare that to traditional production:
Professional voice actors: $500-$1,000 per episode
Recording studio: $100-$300 per session
Video editing: $200-$500 per episode
Total traditional cost: $800-$1,800 per episodeAI cost: ~$16-20 per episode
The savings are absolutely game-changing.
Final Export and Upload
Before exporting:
Extend all elements (background, audiogram, text) to match your audio length
Zoom out to review the entire timeline
Download in 1080p HD quality
Your video is now ready to upload to YouTube!
Getting Started Today
The AI podcast niche is still relatively new, which means there’s massive opportunity for early adopters. With the right tools and strategy, you can:
✅ Create professional-quality content without showing your face ✅ Produce episodes in hours instead of weeks ✅ Spend $159 instead of $1,000+ per episode ✅ Tap into a global audience of English learners ✅ Build a monetized channel that earns passive income
Special Offer: New Wondercraft users can get 50% off their first month of the Creator Plan, which includes 1,000 credits—more than enough to create your first several episodes.
Conclusion
AI-generated podcasts represent one of the most accessible and profitable faceless YouTube niches available today. With proven channels earning $30,000+ monthly, professional-quality AI tools, and a massive global audience, there’s never been a better time to start.
The barrier to entry has never been lower, and the potential has never been higher. Will you be the next success story in this exploding niche?
Ready to start your AI podcast journey? The tools are here, the audience is waiting, and the opportunity is now. Take action today and join the creators building profitable faceless YouTube channels with AI.
Would you like more tutorials on AI-powered online businesses? Subscribe for weekly guides on leveraging artificial intelligence to build profitable digital ventures.
The AI revolution is here, and it’s creating unprecedented opportunities for entrepreneurs. If you’ve been searching for ways to leverage artificial intelligence to build a profitable online business, you’re in the right place. In this comprehensive guide, we’ll explore five proven Claude AI business ideas that real people are using right now to generate impressive passive income streams.
Claude AI has emerged as one of the most powerful tools for content creation, coding, and automation. What makes it particularly exciting is its ability to handle complex workflows while maintaining consistency and quality. Whether you’re a complete beginner or an experienced entrepreneur, these business models can help you capitalize on the AI boom.
1. Murder Mystery Novels: Your AI-Powered Publishing Empire
The self-publishing industry has exploded, and murder mystery novels are experiencing unprecedented demand. Recent market research reveals that beach fiction—short, engaging novels perfect for vacation reading—is selling exceptionally well on Amazon Kindle, even from unknown authors.
The Opportunity
Here’s what makes this niche so attractive: readers of murder mysteries are voracious consumers who constantly seek new content. They don’t necessarily care about author fame; they want engaging stories they can devour quickly. This creates a perfect environment for AI-assisted authors to thrive.
One successful author we analyzed published nine murder mystery novels in just two years. Using Amazon sales estimation tools, we discovered they’re selling approximately 391 books daily, generating a substantial monthly income despite having minimal social media presence (just 500 Facebook followers).
The Six-Step Claude AI Workflow
Step 1: Create a Claude Project Start by setting up a dedicated project in Claude. This feature allows you to organize related chats and files, making it easy for the AI to cross-reference information as you develop your novel.
Step 2: Generate Your Core Twist Create a new chat within your project and explain your book’s theme. For example, if you’re writing a gardening-themed mystery, ask Claude to brainstorm unique plot twists. One effective twist: a community garden member gets poisoned by a plant, but they were the wrong target. Save this as a reference document.
Step 3: Build Your 12-Step Mystery Formula Request that Claude create a structured 12-step mystery formula based on your chosen twist. This classic detective story structure divides narratives into 12 predictable acts that readers love. Download and save this framework.
Step 4: Develop Character Profiles Ask Claude to map out all characters needed for your formula and create detailed profiles for each. These become essential reference documents for maintaining consistency throughout your novel.
Step 5: Create Your Master Outline Instruct Claude to synthesize all your documents into a comprehensive chapter-by-chapter outline with all necessary writing notes.
Step 6: Write Your Novel Now comes the magic: simply ask Claude to write each chapter sequentially using your reference documents. Once complete, compile the chapters into a Google Doc, edit as needed, and upload to Amazon KDP using Kindle Create.
2. Logic Grid Puzzle Books: Passive Income Through Print-on-Demand
Puzzle books represent another lucrative opportunity, particularly logic grid puzzles (also known as Einstein riddles). These engaging brain teasers present scenarios with clues that solvers must mark on a grid to discover the answer.
Why Puzzle Books Work
The beauty of puzzle books lies in their evergreen appeal and Amazon’s print-on-demand service. When you upload a PDF to Amazon KDP, they handle printing, shipping, and customer service. Each sale generates passive commission income with zero inventory management.
One successful publisher, “Unicorn Books,” has created multiple logic grid puzzle books targeting various themes and niches. Their bestselling title sells 15-16 copies daily without active promotion.
Creating Print-Ready Puzzles with Claude
Claude excels at generating structured logic puzzles. Simply provide a scenario theme—like a locked-room murder mystery—and request a print-ready grid puzzle. Claude will generate the scenario, clues, grid structure, and solution.
You can create themed collections targeting specific audiences:
Holiday-themed puzzles
Corporate team-building editions
Educational versions for different age groups
Niche hobby-themed puzzles
3. Spreadsheet Dashboards: The Hidden Etsy Goldmine
Spreadsheet dashboards have emerged as one of Etsy’s most profitable digital product categories. These aren’t just basic spreadsheets—they’re beautifully designed, functional tools that help people manage everything from weddings to business finances.
The Market Potential
One Etsy store specializing in Excel dashboard templates achieved over 143,000 sales in just 2.5 years, becoming a seven-figure business. Their bestsellers include:
Wedding planner dashboards (14 sales today)
Daily task trackers (3 sales today)
Annual budget spreadsheets (38 sales today)
Claude’s Excel Integration Game-Changer
Claude now features direct integration with Microsoft Excel, making dashboard creation incredibly efficient. After installing the integration (which takes less than a minute), you get a Claude button in Excel that opens as a side widget.
Simply upload your data and ask Claude to create a colorful, functional dashboard with graphs. For example, you could transform YouTube analytics data into a creator dashboard, or convert financial records into a business intelligence tool.
Even if you customize the final product, Claude saves hours of initial setup work, allowing you to focus on design refinement and marketing.
Notion has revolutionized productivity, and businesses are willing to pay premium prices for custom templates. Design agencies charge hundreds of dollars per template, creating an excellent opportunity for AI-powered service providers.
The Business Model
One Fiverr agency creating custom Notion templates maintains four active orders with an average price of $275 per template. Companies need templates for:
Project management systems
CRM databases
Content calendars
Team collaboration hubs
Business process documentation
Streamlining Template Creation with Claude
Claude dramatically accelerates the template creation process. Simply describe the client’s needs, and Claude generates a detailed Notion AI prompt. For instance, request a dashboard for a dog-walking business, and Claude creates a comprehensive prompt including database structures, views, and automation.
Copy this prompt into Notion’s AI (selecting Claude as the model), and watch as Notion builds your template from scratch in minutes. You can then refine it using Notion’s AI or manual edits. Each section connects to functional databases that clients populate with their data.
5. Printable Games: The Canva-Powered Etsy Strategy
Printable games represent another thriving Etsy category. From baby shower games to holiday bingo cards, these digital downloads generate consistent sales with minimal overhead.
Success Stories
One Etsy store selling printable games achieved over 200,000 sales in three years. Popular products include:
Thanksgiving bingo card packs
Emoji baby shower games (6 sales daily)
Wedding party games
Educational activity sheets
The Claude-to-Canva Workflow
Here’s the powerful two-step process:
Step 1: Generate with Claude Ask Claude to create your game as a PDF. For example, request a “Guess Who” baby shower game. Claude generates the questions, formatting, and delivers a complete PDF. Request adjustments like changing background colors or fonts until it’s perfect.
Step 2: Customize in Canva Upload your PDF to Canva’s free PDF converter. Canva’s AI transforms it into an editable design. Swap fonts, adjust spacing, modify text, and add branding elements. Download as a print-ready PDF optimized for customers.
This workflow combines Claude’s content generation power with Canva’s design flexibility, creating professional products in minutes.
Getting Started: Your Action Plan
These five Claude AI business ideas represent proven opportunities in growing markets. Here’s how to begin:
Choose Your Niche: Select one business model that aligns with your interests and skills
Master the Workflow: Practice the specific Claude prompts and processes outlined above
Research Your Market: Study successful competitors on Amazon, Etsy, or Fiverr
Create Your First Product: Don’t aim for perfection—launch and iterate
Scale Systematically: Once one product sells, create variations and expand your catalog
Key Success Factors
Quality Matters: While AI accelerates creation, always review and refine outputs
Niche Down: Specific themes outperform generic products
Customer Focus: Solve real problems and address specific audiences
Conclusion: The Time to Start Is Now
The AI revolution isn’t coming—it’s here. These five Claude AI business ideas demonstrate that you don’t need technical expertise, large capital, or an existing audience to build profitable online businesses. What you need is the willingness to learn, experiment, and take action.
Claude AI has democratized content creation, product development, and service delivery. Whether you’re drawn to publishing mystery novels, creating puzzle books, designing dashboards, building Notion templates, or crafting printable games, the tools and workflows exist to help you succeed.
The entrepreneurs profiled in this article started exactly where you are now. They identified opportunities, leveraged AI tools strategically, and built sustainable income streams. You can do the same.
Ready to take the next step? Choose one business idea from this list, commit to creating your first product this week, and join the growing community of AI-powered entrepreneurs reshaping the digital economy.
Here’s a stunning statistic: 84% of businesses in America don’t have any employees. That’s 30 million people successfully running one-person businesses. Even more impressive? 77% of them become profitable within the first year.
This explosion of solopreneurship isn’t happening by accident—it’s powered by recent advancements in artificial intelligence. But here’s where most people go wrong.
The Biggest Mistake Aspiring AI Entrepreneurs Make
When you search for how to build a business with AI, most advice points you in one direction: “Build an app!” Everyone’s talking about vibe coding, cloud coding, and creating the next big AI-powered software.
But here’s the harsh reality: The majority of AI-created apps don’t even make $100. More than 99% completely fail.
Why? Because building a usable app requires significant technical skills, time investment, and there’s no guarantee anyone will buy it. You could spend months learning to code, only to launch something nobody wants.
The good news? You don’t need to build an AI app to make $10,000 per month. All you need is to sell a skill and let AI do the heavy lifting.
Products vs. Services: Which Path Should You Choose?
When building a one-person business with AI, you essentially have two options:
Selling a Product (AI Apps)
Pros:
Build once, sell forever
Passive income potential
Scalable without additional time investment
Cons:
Time-consuming to learn technical skills
High upfront development time
No guarantee of sales
99% failure rate
Selling AI-Powered Services
Pros:
Zero startup time and cost – You’re selling a promise
Make money immediately
No technical skills required
Clients pay before you build
Can eventually productize into an app
Cons:
Less scalable than software (initially)
Requires client interaction
The service model wins for beginners because you sell first, build later. You don’t invest time or resources until money hits your bank account.
What Exactly Is an AI-Powered Service?
An AI-powered service is simple: Take any skill traditionally done without AI, and have AI do all the work.
Examples include:
Cold email writing
YouTube script writing
Thumbnail design
SEO blog post creation
Resume optimization
Social media management
Business coaching
Content strategy
Here’s the key insight: Clients don’t care if you use AI. They care about results. Just like restaurant diners don’t care how the meal is cooked—they care how it tastes and looks when served.
Real Success Story: Sandy’s Journey
Sandy had zero AI experience but was passionate about learning. She started an AI automation agency focused on writing SEO-optimized blog posts for tech companies.
The results?
Started at $3,000/month
Within months: $5,500/month
Spends only 15 minutes per day creating content
Now one of the fastest-growing female AI creators on YouTube
Does this while working full-time
Sandy didn’t know SEO. She used Claude AI to generate high-quality blog posts, delivered them to clients, and got results. That’s it. Clients were happy to pay because the content worked—regardless of how it was created.
Finding Your Perfect AI Business Idea Using Ikigai
The biggest challenge for most people? Choice paralysis. You have too many skills, too many options, and you’re afraid of picking the wrong idea.
The solution comes from a Japanese concept called Ikigai—your reason for being. It combines four elements:
What you love
What you’re passionate about
What you can be paid for
What the world needs
How to Use Claude to Find Your Ikigai
You can actually use Claude AI to help discover your perfect business idea. Here’s the process:
Answer key questions about your interests, skills, and passions
Identify market needs in industries you understand
Combine these elements to find your unique advantage
Validate pricing and service delivery methods
Case Study: Brandon’s $10K/Month Transformation
Brandon was a VP at a construction glass company making $750/month as side income. Using the Ikigai framework, we discovered:
What he loved: Videography, photography, content creation What he was good at: Sales, video production, personal branding What the world needs: Construction and glazing companies need content marketing What he can be paid for: Coaching companies on content creation
The result? Brandon now charges $2,000-$3,000 per client, helping construction companies create video content and personal branding. He reached $10,000/month within 30 days while keeping his full-time job.
How to Deliver AI-Powered Services Using Claude Skills
Once you know what to sell, you need a delivery system. The goal: Maximum results with minimal effort.
The Claude Skills Framework
Here’s how to structure your service delivery:
Identify the top 3 challenges your ideal customer faces
Create custom Claude Skills to solve each challenge
Use these skills during client work to automate delivery
Example: Career Coaching Service
If you’re helping people land dream jobs, the three main pain points are:
Poor resume and LinkedIn profile
Can’t get interviews
Poor interview performance
For each, you create a Claude Skill. When a client pays you $5,000, you simply:
Input their information into your custom skill
Let Claude generate optimized resumes, cover letters, and interview prep
Review and personalize the output
Deliver results in minutes instead of hours
This is exactly how successful AI consultants operate—Claude does 80% of the work, you provide the human touch for quality control.
How to Sign Your First Clients in 30 Days
You have your service. You know how to deliver it. Now, how do you get people to pay you?
There are only two ways:
1. Build a Personal Brand
Create content on platforms where your audience hangs out:
YouTube
LinkedIn
X (Twitter)
Instagram
Why this works:
Leads come to you
Builds differentiation
Pre-sells clients through content
Increases response rates for outreach
You don’t need fancy editing. Sandy edits all her videos herself using AI, and she’s thriving. Just start creating.
2. Do Strategic Outreach
Reach out to potential clients who don’t know you yet:
LinkedIn DMs
Cold emails
Loom video pitches
Upwork proposals
Pro tip: I recently closed a B2B client by sending a cold LinkedIn message, followed by a personalized Loom video explaining how I could help. They loved it, we hopped on a call, and they signed immediately.
The Power of Combining Both
Outreach without a personal brand? Good luck getting responses. Personal brand without outreach? Slower growth.
Do both together, and you create a powerful client acquisition system.
Your 30-Day Action Plan to $10K/Month
Here’s your exact roadmap:
Days 1-7: Foundation
Complete your Ikigai exercise
Define your AI-powered service
Create your offer and pricing
Set up Claude Skills for delivery
Days 7-14: Aggressive Outreach
Contact at least 20 people per day (100+ per week)
Use LinkedIn, email, or your preferred channel
Track responses and refine your message
Days 14-21: Build Your Brand
Choose one platform to focus on
Start creating simple content
Share your journey and expertise
Don’t worry about perfection—just publish
Days 21-30: Close Deals
Continue outreach
Keep creating content
Book sales calls
Close your first clients
Real results from this system:
Sandy: First client in 1 week
Ivonne: First client within first month
Brandon: 3 clients, $10K/month in 30 days
Why Most People Fail (And How to Succeed)
Even with the perfect system, you might struggle with:
Commitment to your business idea
Finding your unique advantage
Knowing if you’re on the right path
This is where expert guidance makes the difference. Working with someone who’s already done it can cut months off your learning curve.
The people mentioned in this article—Sandy, Brandon, Ivonne—they all had one thing in common: They took action on a proven system and got guidance when needed.
Ready to Start Your One-Person AI Business?
The opportunity has never been better. With AI tools like Claude, you can:
Start with zero technical skills
Validate ideas before building
Deliver services in minutes
Scale to $10K/month in 30 days
The question isn’t whether it’s possible. The question is: Will you be the next success story?
The system works. Regular people are doing it. The only thing left is for you to take that first step.
Imagine having your own private AI assistant that runs entirely on your hardware—no internet required, no data sent to the cloud, and complete control over what it can and cannot do. That’s exactly what building a local AI server gives you. In this comprehensive guide, you’ll learn how to set up your own local AI server using Ollama, Open WebUI, and Stable Diffusion, creating a powerful, private AI ecosystem right in your home.
Whether you want to help your kids with homework safely, experiment with AI without privacy concerns, or just have the fastest AI experience possible, this guide will walk you through every step.
Why Build a Local AI Server?
Running AI models locally offers unprecedented advantages over cloud-based solutions:
Complete Privacy: Your conversations and data never leave your network
Lightning Fast: No internet latency means instant responses
Full Control: Customize models, set restrictions, and whitelist features
No Subscription Fees: Once built, it’s yours forever
Offline Capability: Works without an internet connection
Perfect for parents who want AI assistance for their children’s education without the risks of unrestricted internet AI, or for professionals handling sensitive data who need AI capabilities without compromising security.
Hardware Requirements: Building “Terry”
While you don’t need enterprise-grade equipment to get started, more powerful hardware delivers better performance. Here’s what a high-end local AI server build looks like:
High-Performance Build Specifications:
Case: Lian Li O11 Dynamic EVO XL (Full Tower EATX)
Don’t have thousands to spend? You can start with:
Any modern computer (Windows, Mac, or Linux)
8GB+ RAM (16GB recommended)
Any GPU helps, but isn’t strictly required
Even a laptop can run basic models
The key takeaway: The computer you’re using right now can probably run a local AI server.
Step 1: Installing Ollama – The Foundation
Ollama is the backbone of your local AI server, providing the engine that runs AI models locally. Here’s how to get it running:
For Windows Users (Using WSL):
Install Windows Subsystem for Linux: Open PowerShell or Terminal and run:1Follow the prompts to set up your username and password. You may need to reboot.
Update Your System:bash12
Install Ollama:bash1
For Mac Users:
Simply download Ollama from ollama.ai and run the installer. It’s that easy.
For Linux Users:
Run the same curl command as Windows WSL users above.
Verify Installation:
Open your browser and navigate to http://localhost:11434. If you see a message confirming Ollama is running, you’re ready to proceed.
Download Your First Model:
bash1
Test it out:
bash1
Try asking: “Tell me about the solar eclipse”
Pro Tip: If you have an NVIDIA GPU, Ollama will automatically detect and utilize it for dramatically faster performance.
Step 2: Setting Up Open WebUI – Your Beautiful Chat Interface
While Ollama provides the backend, Open WebUI gives you a stunning, feature-rich chat interface that rivals ChatGPT.
Install Docker First:
bash123456789
Deploy Open WebUI:
bash1
Access Your Interface:
Navigate to http://localhost:8080 in your browser.
Create your admin account (the first account automatically becomes admin).
Key Features of Open WebUI:
Multi-Model Conversations: Chat with multiple AI models simultaneously
File Upload Support: Upload documents for AI analysis
Voice Input: Speak your prompts
Model Switching: Easily switch between different AI models
Step 3: Installing Stable Diffusion for Image Generation
Take your local AI server to the next level with AI image generation using Stable Diffusion and Automatic1111.
Install Prerequisites:
bash1
Install Pyenv (Python Version Manager):
bash1
Add to your .bashrc:
bash123
Refresh your terminal:
bash1
Install Python 3.10:
bash12
Install Automatic1111:
bash12345
Access at http://localhost:7860
Integrate with Open WebUI:
In Open WebUI settings:
Go to Settings → Images
Set Automatic1111 Base URL: http://127.0.0.1:7860
Enable “Image Generation (Experimental)”
Save
Now you can generate images directly from your chat interface!
Advanced Features: Custom Models and Parental Controls
One of the most powerful aspects of running a local AI server is complete customization. Here’s how to create restricted models perfect for children or specific use cases.
Creating Custom Model Files:
In Open WebUI, go to Models → Create Model File
Define your base model and system prompt:
12345678910
Save and whitelist for specific users
User Management:
Disable public signups or require admin approval
Whitelist specific models per user
Prevent chat deletion for monitoring
Create multiple user accounts with different permission levels
This is perfect for parents who want AI homework help without enabling cheating.
Integration with Obsidian: AI-Powered Note-Taking
For knowledge workers, integrating your local AI server with Obsidian creates a powerful second brain.
Setup:
Install the “BMO Chatbot” community plugin in Obsidian
Configure connection to http://localhost:11434
Select your preferred model
Enable reference mode to chat with your notes
Now you can:
Ask questions about your notes
Generate content based on existing research
Summarize long documents
Brainstorm ideas with context-aware AI
Performance Optimization Tips
Maximize your local AI server’s performance:
Use GPU Acceleration: Ensure CUDA drivers are installed for NVIDIA GPUs
Monitor Resources: Use nvidia-smi to watch GPU utilization
Choose Appropriate Models: Smaller models (7B-13B) run faster; larger models (70B+) need more VRAM
Quantization: Use quantized models (q4, q8) for better performance with minimal quality loss
Dual GPU Setup: Ollama can utilize multiple GPUs simultaneously for massive speed boosts
Privacy and Security Benefits
Running AI locally means:
Zero data leaves your network
No corporate surveillance
Complete audit trail
Customizable content filters
Compliance with data regulations
This is crucial for businesses handling sensitive information, healthcare applications, legal work, or anyone who values digital privacy.
Conclusion: Your Private AI Future
Building a local AI server might seem complex, but the rewards are immense. You get:
Faster performance than any cloud service
Complete privacy and control
Customizable features for your specific needs
No recurring costs
The satisfaction of running cutting-edge AI on your own hardware
Whether you’re building “Terry” with dual RTX 4090s or starting with an old laptop, the journey to private, local AI is accessible to everyone. The technology is mature, the community is supportive, and the possibilities are endless.
Ready to start? Begin with Ollama today, and you’ll be chatting with your own AI assistant within the hour. Your future self—concerned about privacy, tired of slow cloud services, and excited about AI possibilities—will thank you.
Want to dive deeper? Join communities discussing local AI, experiment with different models, and share your builds. The local AI revolution is here, and it’s running on hardware just like yours.
Have questions about building your local AI server? Drop them in the comments below!
In 2026, data sovereignty and edge AI have become non-negotiable priorities for developers, enterprises, and privacy advocates worldwide. Ollama has evolved into the definitive solution for running large language models (LLMs) locally—a free, open-source platform that empowers you to deploy cutting-edge AI directly on your hardware, eliminating dependency on cloud APIs, subscription fees, or third-party data handling .
With Ollama’s 2026 enhancements, you gain unprecedented control: enhanced model optimization, multi-GPU support, streamlined API workflows, and seamless integration with modern development stacks—all while maintaining complete privacy, zero latency, and unlimited usage. This updated guide walks you through installation, advanced integrations, custom model creation, and best practices tailored for today’s hardware and AI landscape.
Why Ollama Dominates Local AI in 2026
Ollama has matured into the most developer-friendly framework for local LLM deployment . Here’s why it remains the top choice in 2026:
Enterprise-Grade Privacy & Compliance
Running LLMs locally with Ollama ensures your data never traverses public networks. This is critical for compliance with evolving global regulations like GDPR-2, AI Act implementations, and industry-specific standards in healthcare, finance, and legal sectors .
Zero-Cost, Unlimited AI Access
Forget usage caps, token limits, or monthly bills. Ollama remains 100% free and open-source, giving you unrestricted access to state-of-the-art models without recurring costs .
Sub-100ms Local Inference
Thanks to 2026 optimizations—including KV cache improvements, speculative decoding, and hardware-aware quantization—local inference now rivals or exceeds cloud latency for most use cases.
True Offline-First Capability
Work seamlessly in air-gapped environments, remote locations, or during network outages. Your AI assistant is always available, always responsive .
Expanded Model Ecosystem
The Ollama Model Library now hosts 2,000+ optimized models, including:
Next-generation foundation models (Llama 4, Mistral-Nemo, Gemma 3)
Multimodal models supporting image, audio, video, and sensor data
Efficient “tiny” models designed for edge devices and mobile deployment
Getting Started: Installing Ollama in 2026
Step 1: Download the Latest Version
Visit ollama.com (now with enhanced model discovery and one-click installers). Ollama supports:
Windows 11/12: Native ARM64 and x64 installers with WSL2 integration
macOS 14+: Universal binaries optimized for Apple Silicon (M3/M4 series)
Linux: One-line installer with systemd service management and Docker support
WSL2 & Containers: First-class support for development environments
Step 2: Streamlined Installation
The 2026 installer features:
Automatic hardware detection (CPU/GPU/NPU)
Optional CUDA, Metal, or ROCm backend selection
Integrated model cache management
Background service configuration
Step 3: Verify & Update
Open your terminal and run:
bash12
You’ll see version information and available updates. Ollama now supports automatic background updates for security patches and performance improvements .
WebSocket streaming: Real-time token streaming for chat UIs
gRPC interface: For high-performance microservices
OpenAPI 3.1 spec: Auto-generated docs at http://localhost:11434/docs
Start the server manually (if needed):
bash1
Python Integration: Official Client v2.0
Install the enhanced client:
bash1
Example with async streaming and structured outputs:
python1234567891011121314151617
JavaScript/TypeScript Support
bash1
typescript1234567891011
Framework Integrations
Ollama now offers official plugins for:
LangChain 2026: from langchain_ollama import ChatOllama
LlamaIndex: Vector store + local inference pipelines
Next.js App Router: Edge-compatible local AI hooks
FastAPI: Auto-documentation for AI endpoints
Creating Custom AI Models: 2026 Modelfile Syntax
Enhanced Modelfile Capabilities
Modelfiles now support:
Multi-stage inheritance (FROM + MERGE)
Dynamic system prompts with variable injection
Tool/function calling definitions
Safety guardrails and content filters
Example: Customer Support Assistant
Modelfile:
12345678910111213141516171819202122
Build & Deploy:
bash12
Deploy Custom Models at Scale
New in 2026:
bash12345678
Best Practices for Local LLMs in 2026
Performance Optimization
Use NPU acceleration: Apple Neural Engine, Qualcomm Hexagon, or Intel NPU for 3-5x efficiency gains
Enable memory pooling: OLLAMA_NUM_PARALLEL=4 for concurrent requests
Leverage model caching: Frequently used models stay in VRAM for instant access
Quantize strategically: Q4_K_M offers best accuracy/size balance for most tasks
Security Hardening
Run Ollama in a dedicated user account or container
Use --api-key for authenticated API access in production
Enable audit logging: OLLAMA_LOG_LEVEL=debug
Regularly scan models with ollama scan <model> (new security feature)
Sustainable AI Practices
Prefer smaller, efficient models for routine tasks
Use scheduled inference windows to align with renewable energy availability
Monitor power usage with ollama stats --power
Real-World Use Cases in 2026
Edge AI & IoT
Run vision-language models on Raspberry Pi 5 + Coral TPU for smart cameras
Deploy localized assistants on industrial equipment for predictive maintenance
Healthcare & Research
Fine-tune medical models on de-identified local datasets
Ensure HIPAA/GDPR compliance by keeping patient data on-premises
Education & Accessibility
Offline AI tutors for remote schools with limited connectivity
Real-time translation and transcription models for multilingual classrooms
Creative Professionals
Local AI for scriptwriting, design ideation, and content editing without cloud dependency
Custom style models trained on personal portfolios
Troubleshooting: 2026 Quick Reference
Issue
Solution
Model download stalled
ollama pull <model> --resume or check ~/.ollama/logs/
GPU not detected
Update drivers; run ollama doctor for diagnostics
High memory usage
Use --num-gpu-layers 20 to balance CPU/GPU load
API timeout
Increase OLLAMA_KEEP_ALIVE=10m for long-running sessions
Model accuracy drop
Try less aggressive quantization: :Q5_K_M instead of :Q4_K_M
Run ollama doctor (new in 2026) for automated system checks and fix suggestions.
Conclusion: Own Your AI Future in 2026
Ollama has matured from a developer tool into a comprehensive platform for sovereign, efficient, and ethical AI deployment. In 2026, running LLMs locally isn’t just possible—it’s preferable for performance, privacy, and cost.
Whether you’re building the next breakthrough application, protecting sensitive enterprise data, or simply exploring AI without compromises, Ollama gives you the freedom to innovate on your terms. With continuous improvements in model efficiency, hardware support, and developer experience, there’s never been a better time to bring AI home.
Ready to lead the local AI revolution? → Download Ollama 2026: ollama.com → Explore models: ollama.com/library → Join the community: GitHub • Discord • Forum
Your private, powerful, and future-proof AI starts with a single command.
Call to Action: What will you build with local AI in 2026? Share your Ollama projects in the comments, subscribe for cutting-edge AI tutorials, and download our free Local LLM Optimization Checklist (link in description)!
Artificial intelligence continues to revolutionize how we work, and a new Japanese smart agent is making waves in the productivity space. Felo AI promises to transform the way you create professional presentations, build landing pages, generate comprehensive reports, and much more. What’s even better? It offers an impressive free plan that actually delivers value.
In this comprehensive review, we’ll explore everything Felo AI has to offer, from its powerful AI agents to its seamless Canva integration, and help you determine if it’s the right tool for your workflow.
What Is Felo AI?
Felo AI is an advanced AI-powered platform that functions as a multi-purpose smart agent capable of handling diverse tasks. Unlike single-function AI tools, Felo AI combines multiple capabilities into one unified workspace, allowing users to create professional PowerPoint presentations, build information-rich landing pages, generate detailed reports, conduct research analysis, and even summarize YouTube videos.
The platform stands out by offering various specialized agents, each designed to tackle specific tasks with precision. Whether you’re a content creator, business professional, researcher, or entrepreneur, Felo AI provides the tools to streamline your workflow and boost productivity.
Getting Started: Free Credits & Account Setup
One of the most attractive aspects of Felo AI is its generous free tier. When you sign up, you typically receive 200 credits daily, plus a bonus of 1,000 credits for new users, totaling 1,200 credits to start exploring the platform.
However, there’s a better way to begin: using a referral link gives you 1,500 free credits instantly, providing substantially more room to test all features without immediate limitations.
How to Create Your Account:
Search for “Felo AI” or use a referral link
Click “Log In” and sign in with your Google account
Access the intuitive interface and start creating
Monitor your credits from the account dashboard
The credit system works similarly to other AI platforms, where different tasks consume varying amounts of credits based on complexity. While 200 daily credits might seem limited, strategic use can go a long way, especially for individual users or small projects.
Powerful Features That Set Felo AI Apart
1. AI Slides: Professional Presentations in Minutes
The AI Slides feature is arguably Felo AI’s strongest offering. This tool leverages Canva’s design engine in the background, creating beautifully designed presentations that you can further customize directly in Canva.
How It Works:
Specify your topic (e.g., “AI news this week”)
Define time range (last 7 days, month, etc.)
Set your interests (new models, latest tools, AI agents, major updates)
Choose language and tone
Upload supporting files (PDFs, documents) if needed
The AI then searches the web, gathers relevant information, creates an outline, and designs complete slides with proper formatting, images, and citations. You can watch the presentation being built in real-time, which is both impressive and educational.
Key Advantages:
✓ Canva Integration: Edit designs further in Canva ✓ Source Citations: All information is properly sourced ✓ Brand Templates: Upload your logo, set brand colors with hex codes ✓ Multiple Formats: Download as PowerPoint or PDF ✓ Real-time Creation: Watch your presentation come to life
2. Research Analysis Agent
For those who need comprehensive reports, the Research Analysis agent transforms topics into detailed, well-structured documents. Simply provide your subject, and the AI conducts thorough research, analyzes data, and presents findings with charts, graphs, and actionable insights.
This feature proves invaluable for:
Market research
Competitive analysis
Academic papers
Investment reports
Industry trends
3. AI Page Builder
Create stunning landing pages automatically with the AI Page feature. Request a page about any topic (e.g., “Best AI Companies to Invest in 2025”), and Felo AI will:
Search and analyze relevant data
Generate interactive elements
Create charts and visualizations
Add relevant images
Structure content for maximum impact
4. YouTube Video Summarization
Save hours of watching time with the YouTube agent. This feature summarizes video content, extracting key points and main ideas. While it works excellently with English content, Arabic language support may vary.
Perfect for:
Staying updated with industry news
Research without watching full videos
Content repurposing
Learning efficiently
5. Intelligent Search Capabilities
Felo AI offers multiple search modes to suit different needs:
Web Search: General internet research
Academic Papers: Scholarly sources and research
X (Twitter) Search: Real-time social media insights
File Upload Search: Analyze your own documents
Pro Search: Advanced features (paid plan)
The platform transparently shows its research process, displaying sources found and how it’s using them to construct answers.
Custom AI Agents: Build Your Own Workflow
One of Felo AI’s most powerful features is the ability to create custom agents tailored to your specific needs. The platform offers two types:
Intelligent Agents
These follow your instructions and adapt dynamically to complete tasks autonomously.
Custom Agents
Define each step precisely, creating a structured workflow for repetitive tasks.
Example Use Case: Build a company research agent that automatically:
Collects company data
Finds funding information
Gathers team email contacts
Compiles everything into a structured report
Tool Management
Control exactly how your agents operate by enabling or disabling specific tools:
Web search
Knowledge base access
Code execution
Image generation
File uploads
API integrations
Through system instructions, you define the agent’s behavior, tone, and methodology, ensuring consistent, high-quality outputs.
Seamless Integrations
Felo AI doesn’t work in isolation. The platform connects with tools you already use:
✓ Notion – Sync your notes and databases ✓ Gmail – Process emails automatically ✓ Google Drive – Create presentations from your data ✓ MCP Servers – Connect custom infrastructure ✓ Canva – Edit and refine designs
These integrations transform Felo AI from a standalone tool into a central hub for your AI-powered workflow.
Pricing & Credits: Is It Worth It?
Free Plan
200 credits daily
Access to basic models
Core features available
Perfect for testing and light usage
Pro Plan
$150/year ($12.50/month)
Advanced models access
Pro Search features
Higher credit limits
Priority processing
Is the Free Plan Enough?
For individual users, students, or those testing the platform, 200 daily credits can suffice for moderate use. However, power users creating multiple presentations or conducting extensive research might find credits deplete quickly.
Maximizing Your Credits:
Use referral links – Both you and your friend get 1,500 credits
Multiple accounts – Some users create additional accounts
Strategic usage – Focus on high-value tasks
Upgrade if needed – $150/year is reasonable compared to competitors
Compared to other AI presentation tools in 2025, Felo AI’s pricing remains competitive, though some alternatives offer different usage limits at varying price points.
Real-World Performance: What to Expect
Based on hands-on testing, here’s what you can expect:
✅ Strengths:
Impressive Design Quality: Presentations look professional immediately
Time-Saving: What takes hours manually completes in minutes
Multilingual Support: Works with Arabic, English, and other languages
Transparent Process: See exactly how AI builds your content
Canva Flexibility: Edit and customize without limitations
Good Free Tier: Actually usable without immediate payment
⚠️ Limitations:
Credit Consumption: Complex tasks use credits quickly
Language Formatting: Right-to-left languages need manual adjustment
Learning Curve: Optimizing prompts requires practice
Daily Limits: 200 credits may restrict heavy users
Pro Tip: Always provide clear instructions about tone, detail level, and focus areas. The more specific you are, the better the results.
Who Should Use Felo AI?
Perfect For:
📊 Content Creators – Generate presentation content for podcasts, videos, or blogs 💼 Business Professionals – Create pitch decks and reports quickly 🎓 Students & Researchers – Compile research and create academic presentations 🛒 E-commerce Sellers – Product research and market analysis 📈 Marketers – Landing pages and campaign presentations 👥 Teams – Collaborate on presentations with brand consistency
Less Ideal For:
Users needing unlimited daily generation
Those requiring advanced customization without Canva
People working exclusively offline
Tips for Maximizing Felo AI
Start with Referral Credits – Use a referral link for 1,500 bonus credits
Pin Favorite Agents – Quick access to frequently used tools
Create Brand Templates – Save time with consistent branding
Combine Features – Use research agent + slides agent for complete workflow
Leverage Integrations – Connect your existing tools
Image Generation Prompt:“Productivity workflow diagram showing Felo AI integrated into daily work process, icons for presentations, research, reports, time-saving concept”
Final Verdict: Is Felo AI Worth Your Time?
Felo AI delivers exceptional value, especially considering its robust free tier. The platform successfully combines multiple AI capabilities into one cohesive tool, eliminating the need to juggle different apps for presentations, research, and content creation.
The Bottom Line:
✨ For Individuals: The free plan provides enough credits for regular use ✨ For Professionals: The $150/year Pro plan offers excellent ROI ✨ For Teams: Brand templates and integrations streamline collaboration
While credit limitations exist, the referral system and strategic usage make it manageable. The Canva integration alone sets Felo AI apart from competitors, offering design flexibility that pure AI presentation tools lack.
Our Recommendation: Start with the free plan using a referral link for maximum credits. Test the AI Slides feature first—it’s the standout capability. If it fits your workflow, the Pro plan’s $150 annual cost is reasonable compared to purchasing separate tools for presentations, research, and content creation.
Get Started Today
Ready to transform your productivity? Use a referral link to claim 1,500 free credits and experience Felo AI’s capabilities without limitations. Share with friends, and you’ll both benefit from bonus credits.
Have questions or specific use cases? Drop them in the comments below. Whether you’re creating presentations, conducting research, or building landing pages, Felo AI might be the productivity boost you’ve been searching for.
The future of work is AI-assisted, and tools like Felo AI are making professional-quality output accessible to everyone. Don’t get left behind—start creating smarter, not harder.